회사 중앙 스토리지가 멈추면 리소스를 다운 받을 수 없는 것을 대비해 IPFS를 구축하려고 한다. IPFS에 대한 자세한 설명은 검색해봤으면 한다.
1. 설치
- 설치법은 사람마다 다양했다. 버전별로 달라지니 아래 링크를 참조하여 버전을 참고하기 바란다. 그리고 윈도우, 맥, 리눅스 설치법도 있으니 참고하기 바란다.
1-1 바이너리 파일 다운로드
$ wget https://dist.ipfs.tech/kubo/v0.15.0/kubo_v0.15.0_linux-amd64.tar.gz1-2 파일 압축 해제
$ tar -xvzf kubo_v0.15.0_linux-amd64.tar.gz

> x kubo/install.sh
> x kubo/ipfs
> x kubo/LICENSE
> x kubo/LICENSE-APACHE
> x kubo/LICENSE-MIT
> x kubo/README.md
1-3 kubo 폴더로 이동하여 설치 스크립트를 실행
cd kubo
sudo bash install.sh

> Moved ./ipfs to /usr/local/bin
1-4 버전 테스트
$ipfs --version

> ipfs version 0.15.0

https://docs.ipfs.tech/install/command-line/#which-node-should-you-use-with-the-command-line
Command-line | IPFS Docs
Command-line Installing IPFS through the command-line is handy if you plan on building applications and services on top of an IPFS node. This method is also useful if you're setting up a node without a user interface, usually the case with remote servers o
docs.ipfs.tech
2. 저장소 초기화
ipfs init

> initializing ipfs node at /Users/jbenet/.ipfs
> generating 2048-bit RSA keypair...done
> peer identity: Qmcpo2iLBikrdf1d6QU6vXuNb6P7hwrbNPW9kLAH8eG67z
> to get started, enter:
>
>   ipfs cat /ipfs/QmYwAPJzv5CZsnA625s3Xf2nemtYgPpHdWEz79ojWnPbdG/readme
맨 밑 줄 ipfs cat을 입력해보면 아래처럼 나온다.
ipfs cat /ipfs/QmYwAPJzv5CZsnA625s3Xf2nemtYgPpHdWEz79ojWnPbdG/quick-startHello and Welcome to IPFS!
██╗██████╗ ███████╗███████╗
██║██╔══██╗██╔════╝██╔════╝
██║██████╔╝█████╗ ███████╗
██║██╔═══╝ ██╔══╝ ╚════██║
██║██║ ██║ ███████║
╚═╝╚═╝ ╚═╝ ╚══════╝
If you see this, you have successfully installed
IPFS and are now interfacing with the ipfs merkledag!
-------------------------------------------------------
| Warning: |
| This is alpha software. use at your own discretion! |
| Much is missing or lacking polish. There are bugs. |
| Not yet secure. Read the security notes for more. |
-------------------------------------------------------
Check out some of the other files in this directory:
./about
./help
./quick-start <-- usage examples
./readme <-- this file
./security-notes3. IPFS daemon 실행
ipfs daemon

> Initializing daemon...
> API server listening on /ip4/127.0.0.1/tcp/5001
> Gateway server listening on /ip4/127.0.0.1/tcp/8080
4. IPFS SERVICE 등록(서버 실행시 자동 실행)
4-1 ipfs.service 파일 생성 및 서비스 정보 입력
sudo vi /etc/systemd/system/ipfs.serviceipfs.service
[Unit]
Description=IPFS Daemon
After=syslog.target network.target remote-fs.target nss-lookup.target

[Service]
Type=simple
ExecStart=/usr/local/bin/ipfs daemon --enable-namesys-pubsub
User=계정명

[Install]
WantedBy=multi-user.target
Service에서 User를 서비스 실행할 계정명으로 바꿔준다.
4-2 실행 명령어 입력
sudo systemctl daemon-reload
sudo systemctl enable ipfs
sudo systemctl start ipfs
//정지
sudo systemctl stop ipfs
//동작상태확인
sudo systemctl status ipfs
5. 외부 설정
$ vi ~/.ipfs/config초기에는 127.0.0.1로 되어있으며 로컬에서만 접속이 가능하다. 아래처럼 바꾸면 외부에서 접근이 가능하며 내부망으로도 변경 가능하다.
  "Addresses": {
    "API": "/ip4/0.0.0.0/tcp/5001",
    "Gateway": "/ip4/0.0.0.0/tcp/8080"
  },
- 127.0.0.1 : 로컬
- 0.0.0.0 : 외부 공개
-192.168.xxx.xxxx : 공유기 및 방화벽 내부망에서만 공개(할당 받은 로컬IP 입력)
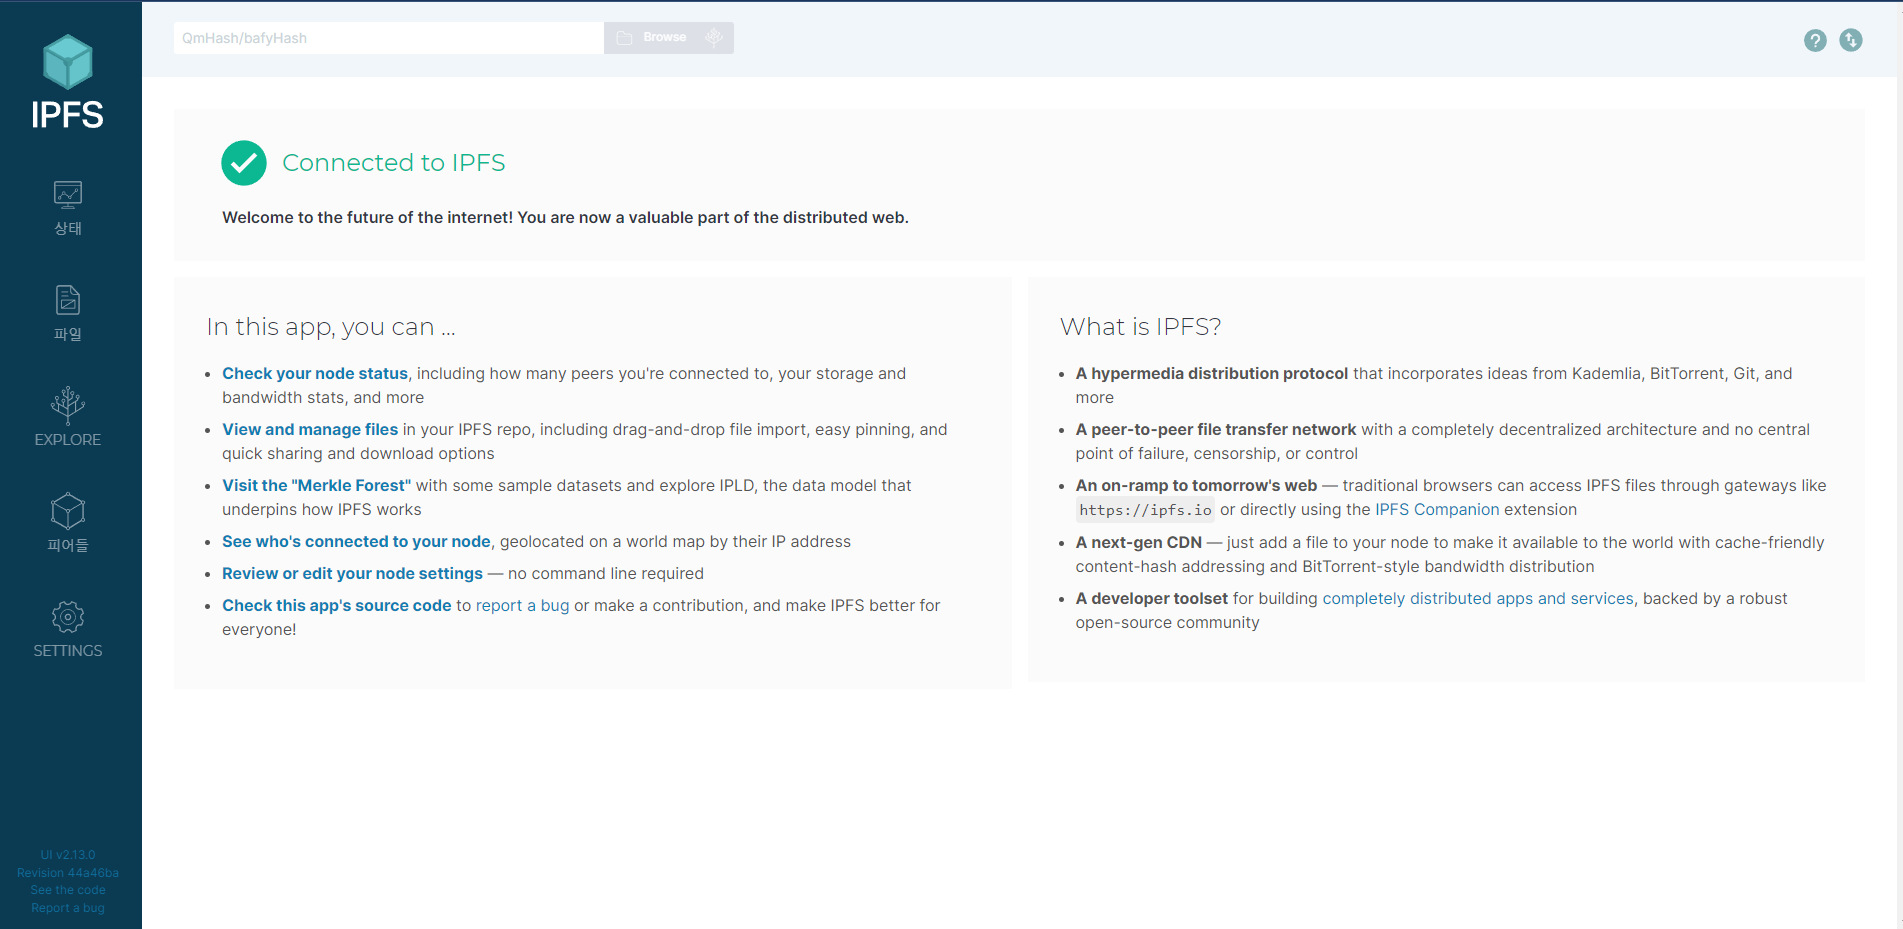
6. WebUI
자신이 윈도우나 가상장치를 사용하여 개발하고 있다면 localhost:5001/webui 로 가능하다. 그런데 나는 우분투서버를 사용하고 있기 때문에 볼 수 없어서 외부 설정을 해서 외부IP로 들어온다. 들어가면 아래처럼 나온다.
6-1 에러
여기서 간혹 아래처럼 에러가 발생하는 경우가 있다. 아마 로컬에서 하는 사람들은 안나오는 것 같은데 나처럼 외부 접속으로 할 경우 생기는 것 같다.
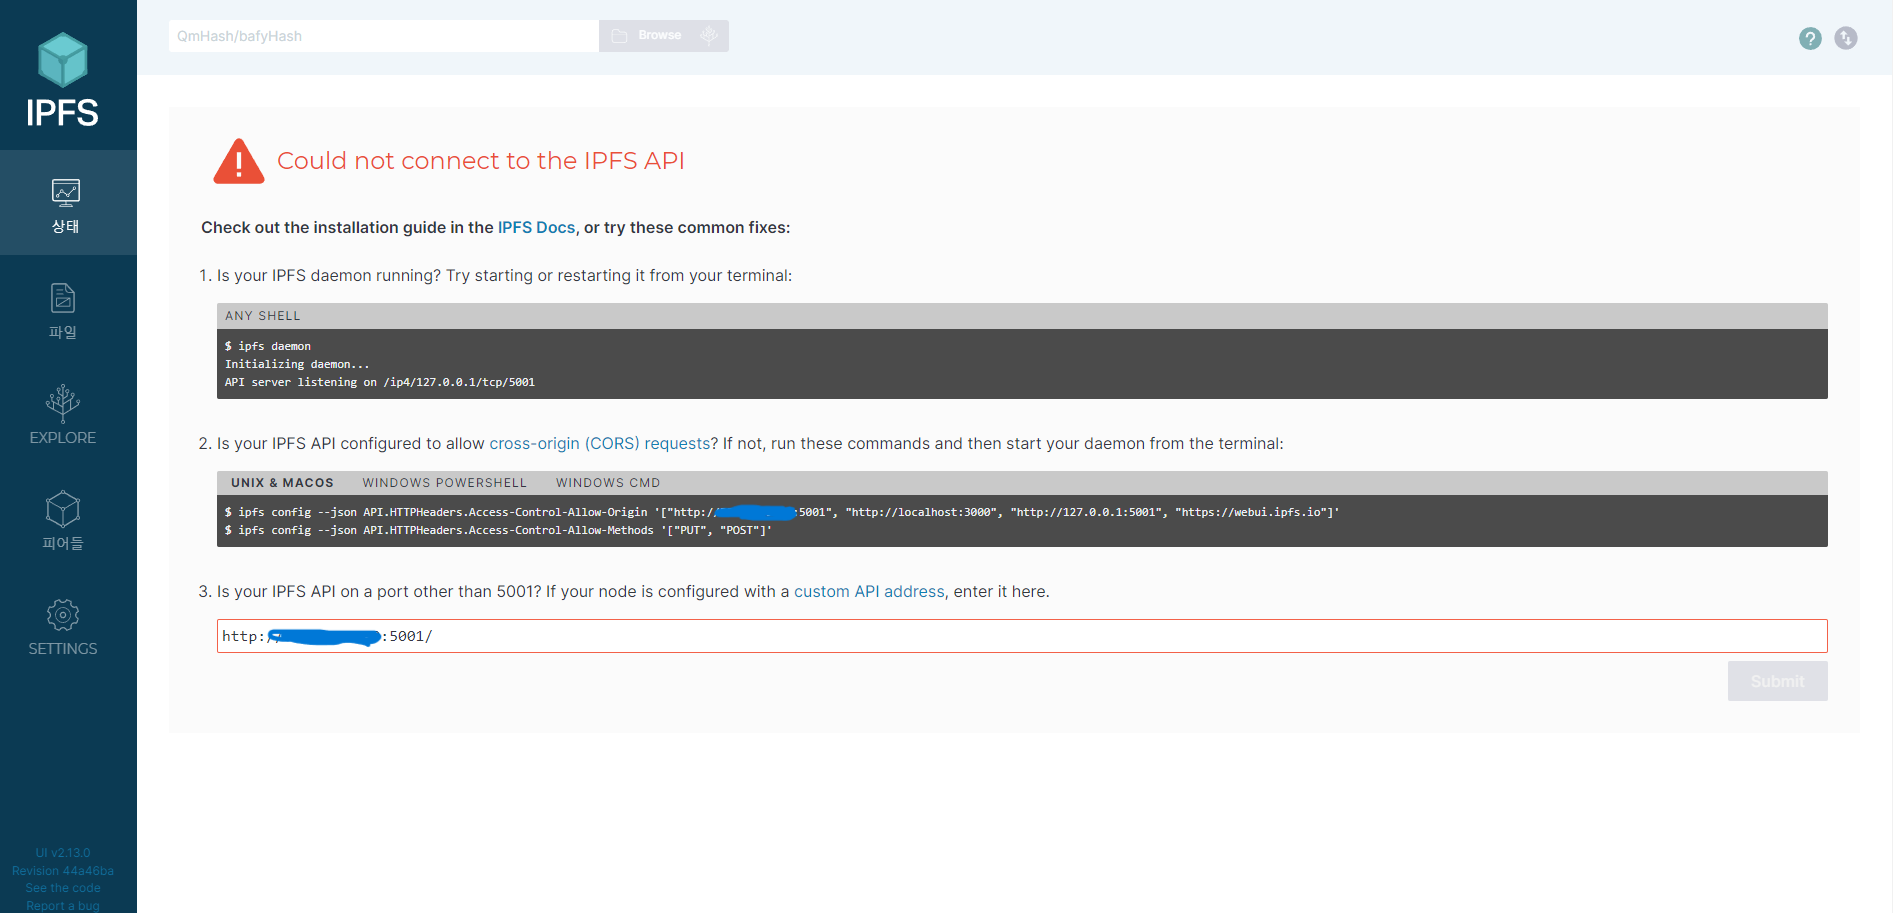
나의 경우는 CORS 허용이 안되있는 것 같았다.
vi ~/.ipfs/config
  "API": {
    "HTTPHeaders": {
      "Access-Control-Allow-Headers": [
        "X-Requested-With",
        "Range",
        "User-Agent"
      ],
      "Access-Control-Allow-Methods": [
        "GET","POST"
      ],
      "Access-Control-Allow-Origin": [
        "http://외부IP:5001",
        "http://localhost:3000",
        "http://127.0.0.1:5001",
        "https://webui.ipfs.io"
        ]
    }
},
config 아래쪽에 잘찾아보면 API 가 비워져있다. 자신의 외부IP를 넣고 붙여넣기 해주고 서비스 재시작을 하면된다.
sudo systemctl restart ipfs7. 기본 사용 포트 정보 (필요에 따라 공유기 및 방화벽에서 포트를 개방)
4001 : SWARM, ip4/0.0.0.0
40000+ : 4만번 이상 포트에서 SWARM 관련 포트가 생성됨
5001 : API, ip4/127.0.0.1
8080 : GATEWAY, ip4/127.0.0.1
https://docs.ipfs.tech/how-to/command-line-quick-start/#web-console
Command-line quick start | IPFS Docs
Command-line quick start If you're command-line savvy and just want to get up and running with IPFS right away, follow this quick-start guide. Please note that this guide assumes that you'll be installing Kubo, the reference implementation written in Go. T
docs.ipfs.tech
'IT > Linux Server' 카테고리의 다른 글
| [Ubuntu Server 20.04 LTS] 사용자 그룹 / 디렉토리 권한 변경 (0) | 2022.05.09 |
|---|---|
| [Ubuntu 20.04 LTS] 포트 확인 및 특정 프로세스 죽이기 (0) | 2021.09.27 |
| [Ubuntu Server 20.04 LTS] FTP 전송 업로드 Error (0) | 2021.07.01 |
| [Ubuntu Server 20.04 LTS] 시스템 종료 & 재시작 명령어 (0) | 2021.06.02 |
| [Ubuntu Server 20.04 LTS] JAVA OPENJDK 11 설치 , 삭제 (0) | 2021.06.02 |